Pritunl is a powerful, open-source enterprise VPN server. Your instance is pre-configured with the Pritunl daemon and MongoDB database, ready for your immediate use.
1. Access the Web Console
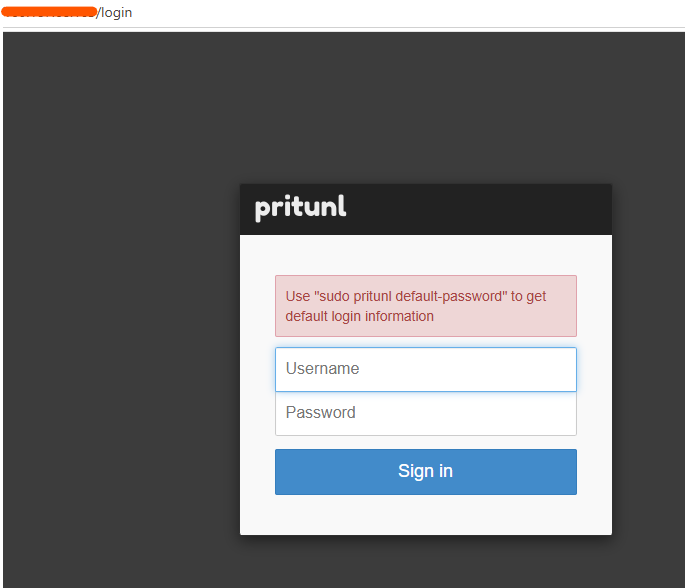
Pritunl uses a web-based management interface. Access it by opening your browser and navigating to your server's IP address:
Access URL:
https://[YOUR_SERVER_IP]
(Note: You may see a "Your connection is not private" warning because the SSL certificate is self-signed. You can click "Advanced" and "Proceed to [IP] (unsafe)" to continue.)
2. Retrieve Default Credentials
Before you can log in for the first time, you must retrieve the default administrative credentials generated during the installation.
-
Log in to your server via SSH.
-
Run the following command:
Bashsudo pritunl default-password -
Copy the output (Username: your_username , Password: your_pass).
3. Initial Configuration
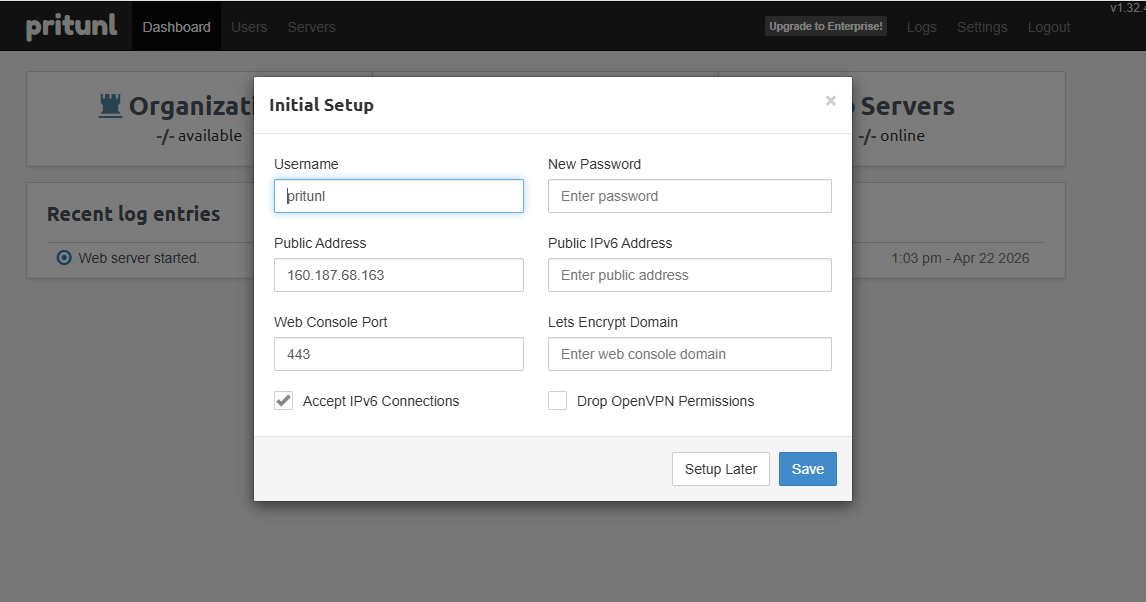
Once logged in, the Initial Setup modal will appear. Configure your settings as follows:
-
Username:
pritunl -
New Password: Set a secure, custom password for your admin account.
-
Public Address: Ensure your server's IP address is populated here.
-
Web Console Port: Keep as
443for standard secure access.
Click Save to apply these changes.
4. System Verification
If you experience connectivity issues, verify that the core services are running correctly by executing these commands via SSH:
| Component | Command |
| Check Pritunl Status | sudo systemctl status pritunl |
| Check MongoDB Status | sudo systemctl status mongod |
| Verify Open Ports | sudo ss -tulnp | grep pritunl |
Based on your current system state, both services are confirmed as active (running).
5. Troubleshooting & Support
-
Default Password: If the
default-passwordcommand is not recognized, ensure the Pritunl package is installed by runningdpkg -l | grep pritunl. -
Port Access: If the web console does not load, ensure that your server's firewall (or cloud security group) allows traffic on ports 80 and 443.
-
Database: Pritunl requires MongoDB. If the dashboard is unresponsive, confirm MongoDB is active using the command in Section 4.
Need Help?
Still stuck? Our support team is ready to assist:
Pro-Tip: Once logged in, navigate to the "Users" tab to create your first VPN user and "Servers" to configure your VPN network settings!