
Thank you for purchasing the SonarQube Deployment stack from the HostGraber Marketplace!
This product delivers a fully pre-installed, high-performance SonarQube Community Edition platform running inside an optimized Ubuntu Docker infrastructure. SonarQube is the leading automatic code review tool to detect bugs, vulnerabilities, and code smells in your source repositories. Backed by a dedicated PostgreSQL 15 database and pre-optimized system kernel maps, your instance is operational and ready to scan code immediately.
What You Can Do with This Stack
-
Continuous Code Inspection: Track code quality metrics, technical debt, and test coverage over time.
-
Security & Vulnerability Scans: Catch injection issues, hardcoded keys, and anti-patterns automatically.
-
Multi-Language Support: Review projects written in Java, JavaScript, TypeScript, C#, Python, C++, and more.
-
CI/CD Automation: Seamlessly link scans to your GitHub Actions, GitLab CI, Jenkins, or Maven development loops.
Step 1: Locate Your Deployment Details
Upon order completion, HostGraber automatically provisions an isolated environment with custom system-level tweaks required by SonarQube's internal Elasticsearch search component.
To view your specific deployment configuration strings at any time, connect to your server via SSH and look at the onboard credentials profile:
cat /root/credential.txt
Your system terminal will output your dedicated setup metrics cleanly:
================================================================
  SONARQUBE DEPLOYMENT - CREDENTIALS
================================================================
  Server IP : <YOUR_SERVER_IP>
  Domain    : <YOUR_SERVER_IP>
  App URL   : http://<YOUR_SERVER_IP>
  Edition   : Community (free, open source)
================================================================
Step 2: Complete Your First Login and Initialization
1. Load the Landing Authentication Page
Open your web browser and navigate to your assigned application address: http://<YOUR_SERVER_IP>. Enter the default initialization profile strings:
-
Login Username: admin
-
Initial Password: admin
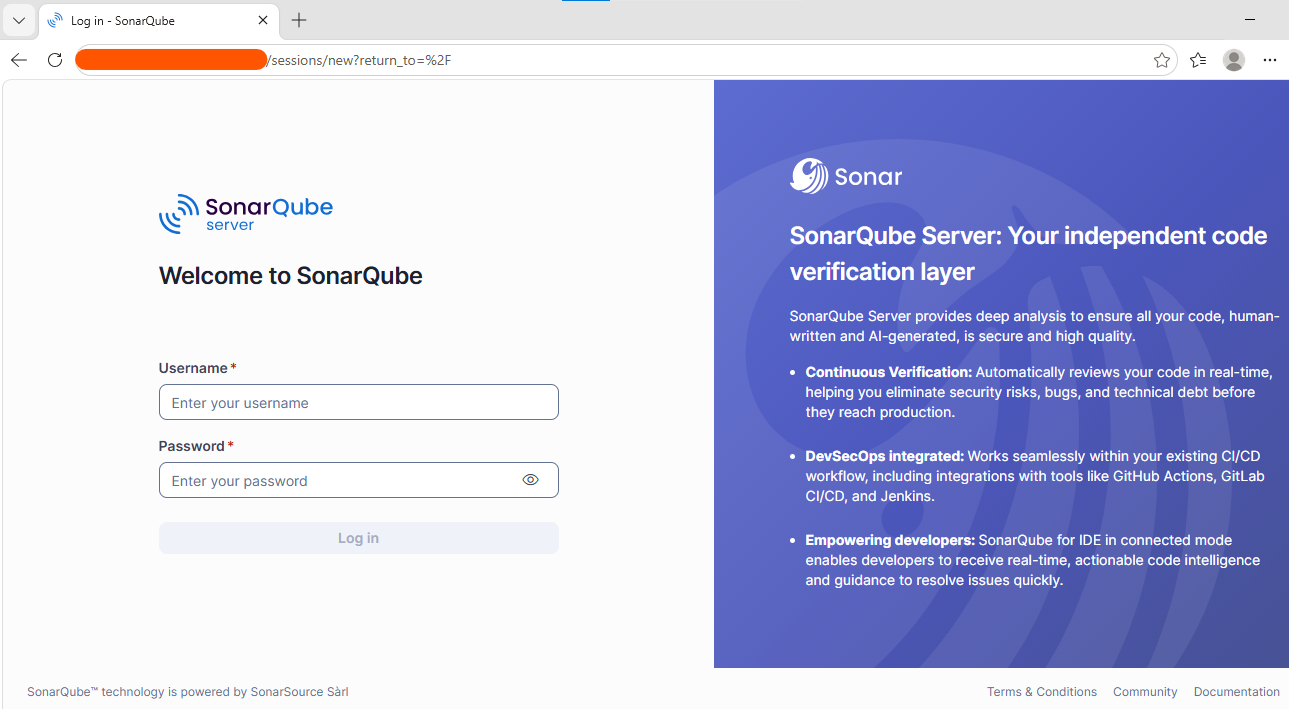
Figure 1: The initial SonarQube system administrative login panel.
2. Update Master Password
SonarQube forces an immediate password rotation policy on your first login to protect your platform. Input your old initialization password (admin), then supply a distinct, secure, and unique root passphrase string.
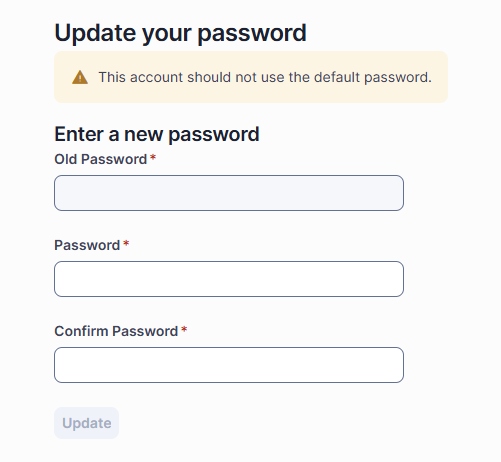
Figure 2: Updating the default administrative authentication keys.
3. Explore the Main Code Analysis Dashboard
After updating your password, you will access the primary SonarQube console area. Your environment is fully configured, connected to its backend database layer, and waiting for its first code repository scanner run.
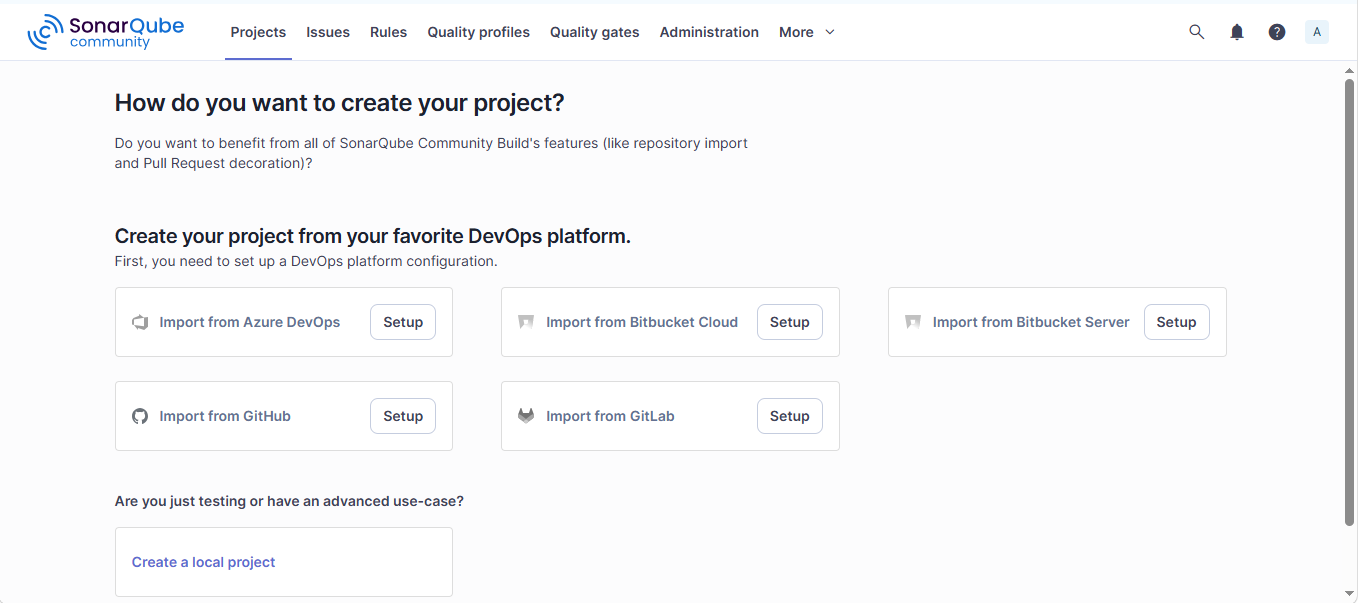
Figure 3: The production-ready SonarQube code quality project overview screen.
Step 3: Generating Tokens for CI/CD Pipelines
To allow your build runners, terminal tools, or repositories to securely push code analysis records to your server, you need to establish a dedicated communication token:
-
Click your user avatar in the top-right corner and choose My Account.
-
Click the Security tab link.
-
Provide a clear identifier name (e.g.,
github-actions-runner) under the generation form. -
Click Generate Token and save the secret string somewhere safe.
Step 4: Code Scan Execution Blueprints
Once you have your token, you can invoke scanners directly inside your code directories. Choose the snippet that matches your project architecture framework:
Integration Blueprint A: Apache Maven Projects
Run this standard command inside your Java project root folder containing your pom.xml configuration file:
mvn sonar:sonar \
  -Dsonar.host.url=http://<YOUR_SERVER_IP> \
  -Dsonar.login=<YOUR_GENERATED_TOKEN>
Integration Blueprint B: Standard Sonar-Scanner CLI
For generic configurations or JavaScript/TypeScript/Python environments, run this statement from your base workspace directory:
sonar-scanner \
  -Dsonar.projectKey=my-project-id \
  -Dsonar.sources=. \
  -Dsonar.host.url=http://<YOUR_SERVER_IP> \
  -Dsonar.login=<YOUR_GENERATED_TOKEN>
Integration Blueprint C: GitHub Actions Integration
Add these environment references directly to your secure repository actions block (.github/workflows/sonar.yml):
uses: sonarsource/sonarqube-scan-action@master
env:
  SONAR_TOKEN: ${{ secrets.SONAR_TOKEN }}
  SONAR_HOST_URL: http://<YOUR_SERVER_IP>
Core Container Administration Commands
Manage your core scanning engine deployment directly from your server command terminal using these pre-configured utilities:
-
Stream All System Log Profiles:
docker compose -f /opt/sonarqube/docker-compose.yml logs -f -
Isolate SonarQube Application Logs:
docker compose -f /opt/sonarqube/docker-compose.yml logs -f sonarqube -
Gracefully Cycle System Environments:
docker compose -f /opt/sonarqube/docker-compose.yml restart -
Check Container Operational Health:
docker compose -f /opt/sonarqube/docker-compose.yml ps
Critical Infrastructure Warning: NEVER run
docker compose down -vinside your workspace directory. Doing so will permanently wipe your Docker data volumes, destroying your historical analysis trends, project logs, and dashboard settings.
Step 5: Going to Production (DNS & HTTPS)
Before hooking production build environments or webhooks into your server, perform these two configuration steps:
1. Configure Domain Name Mapping
Access your designated third-party Domain Name Registrar administration portal and build a clean DNS A-Record routing your production web hostname (e.g., sonar.yourdomain.com) straight to your public server IP.
2. Enable SSL Encryption Integration (HTTPS)
Secure your team's code reviews, access keys, and source streams by provisioning Let's Encrypt certificates directly inside your host console shell terminal:
# Pull current server package lists
apt update

# Deploy the local reverse-proxy Certbot helper script
apt install certbot python3-certbot-nginx -y

# Compile and bind certificates instantly
certbot --nginx -d sonar.yourdomain.com
3. Sync SonarQube Internal System Variables
After confirming your new secure HTTPS configurations are active, log back into your web interface workspace and navigate directly to: Administration > Configuration > General Settings > Server base URL. Update the entry field to point cleanly to your new secure domain format: https://sonar.yourdomain.com.
4. Erase Plaintext Setup Records
Once all initial administrative configurations are completed and passwords are saved to an external password manager, permanently erase your installation text file from the disk to eliminate plaintext access trails:
shred -u /root/credential.txt
Need Production or Structural Assistance?
If you require support with configuring large monorepo scan logic, custom quality gate parameters, or third-party OAuth access controls, our systems staff is available 24/7: