Purpose
This article provides quick, step-by-step instructions for completing KYC verification. Users can follow the steps below and refer to the linked images/screenshots for visual guidance.
KYC Verification Steps
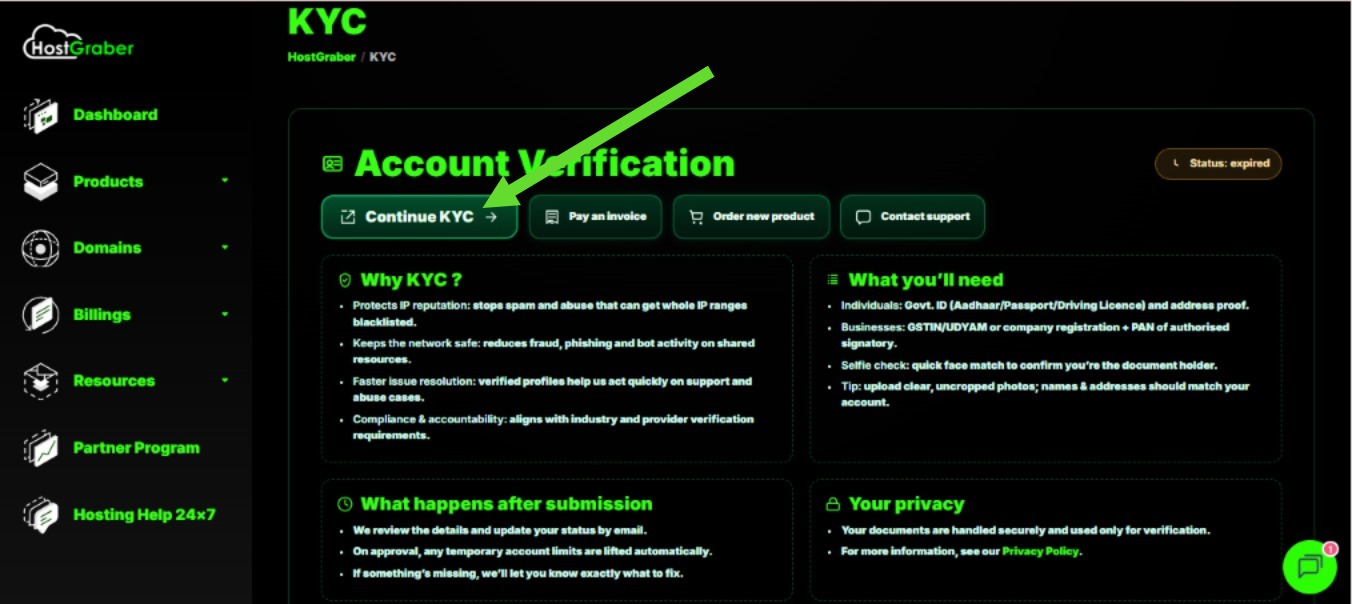
Step 1: Open KYC Section
-
Log in to your client dashboard
-
Go to Account Verification / KYC
-
Click Continue KYC
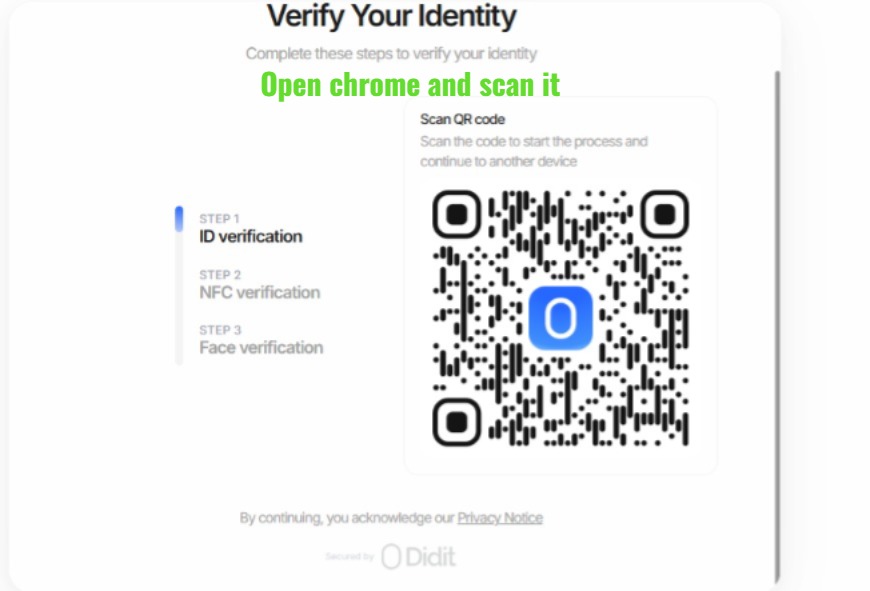
Step 2: Scan QR Code on Mobile
-
A QR code will appear on screen
-
Open Google Chrome on your mobile phone
-
Scan the QR code to continue on mobile
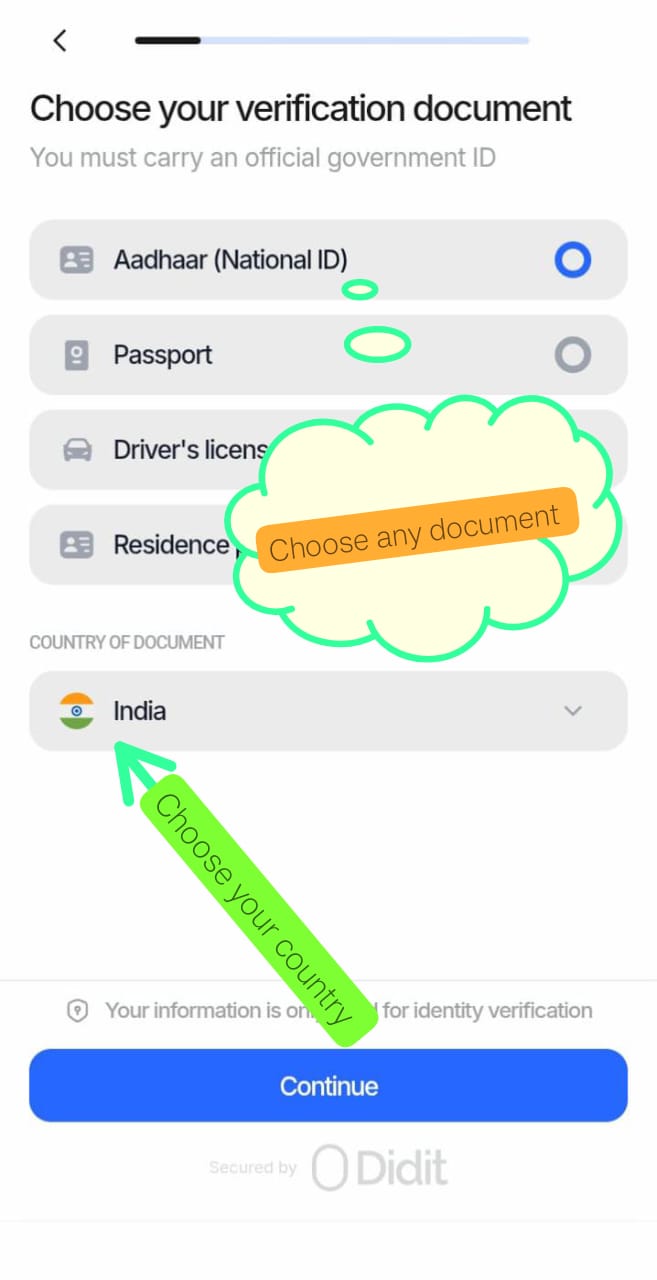
Step 3: Select Verification Document
-
Choose any one government-issued ID:
-
Aadhaar (National ID)
-
Passport
-
Driving Licence
-
-
Select your Country of Document (e.g., India)
-
Tap Continue
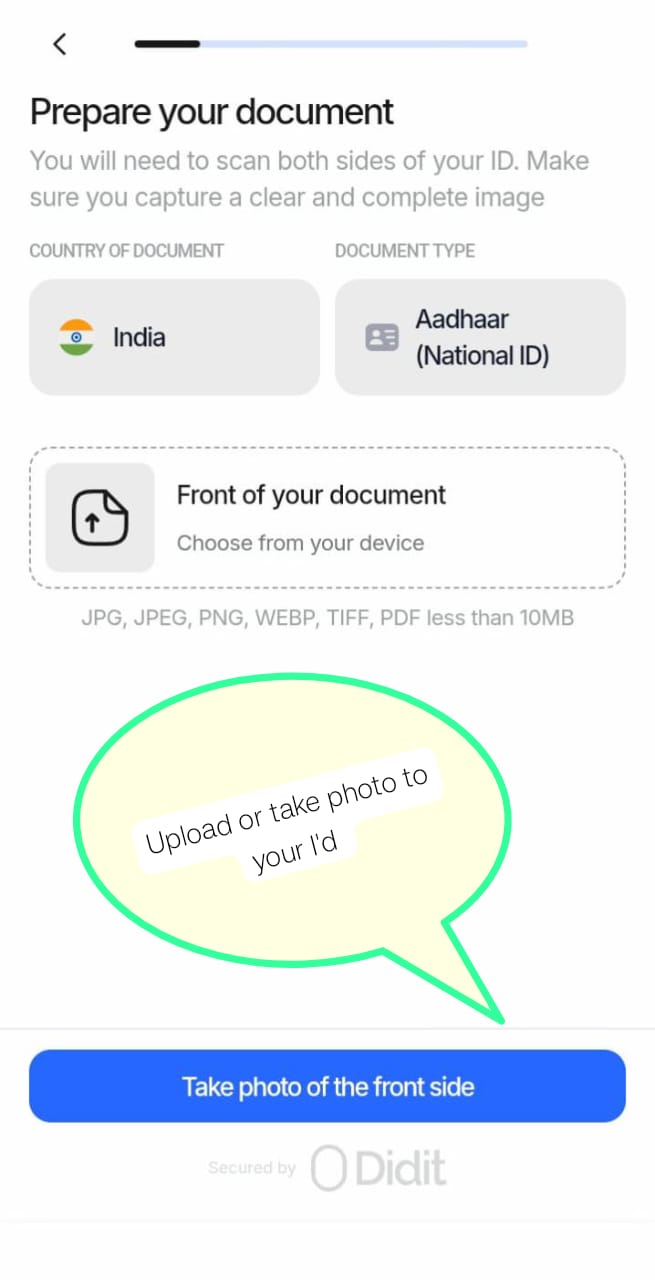
Step 4: Upload ID Document
-
Upload or take a photo of your ID
-
Capture the front side (and back side if prompted)
Accepted formats: JPG, JPEG, PNG, WEBP, TIFF, PDF (Max 10MB)
Step 5: Complete Identity Verification
-
Follow on-screen instructions for:
-
Face verification (selfie)
-
NFC verification (if supported)
-
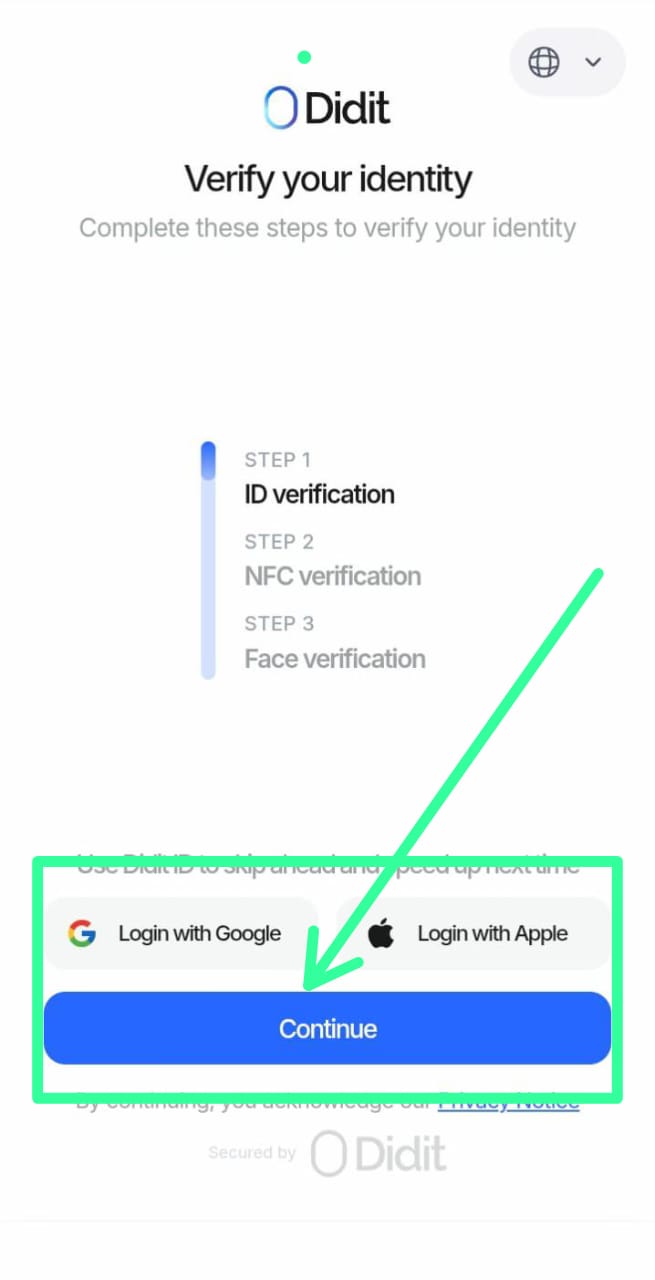
Step 6: Submit Verification
-
Click Continue to submit
-
You may log in with Google/Apple or proceed directly
After Submission
-
Verification is reviewed automatically
-
Status update is sent via email
-
If approved, account limitations are removed
-
If rejected, you will receive instructions to resubmit
Important Notes
-
Use clear, uncropped photos
-
Details on document must match account information
-
Physical original documents only (no screenshots)
Need Help?
If you face any issue during KYC, please contact support from your dashboard.
